Home About me All the recipes. More or less organized Inspiration Wanna send me a note? Italian version

Kumquat, Apple and Pink Grapefruit Jam

Friday, July 31, 2009
Kumquat Jam with Apple and Pink Grapefruit

All right, I knew it. The other day I fell again into jams' vicious circle, even if I had promised my cupboard that I'd use at least all top shelf's jars before sticking in new ones. It's just that walking around Chinatown I found the last remains of kumquats and I suddenly thought of this jam that I had tried about two years ago.(And I also laid my eyes on a huge mountain of lychees, and I have a feeling that they will be next to fall into my pan...).

The following is yet one more recipe I’ve tried taking inspiration from Christine Ferbers’ book, Mes Confitures. For those of you who still don’t know it, she’s like the Queen of Jams, a famous French pastry chef who’s been living in a small Alsatian village for many years, running a little patisserie/jam store that has become a sort of sanctuary for many aficionados. Here you can read the description of her pilgrimage to Niedermorschwihr by Clotilde of Chocolate&Zucchini; and here the great review by Alex of Cuoche dell’Altro Mondo. As some would say, there are those who dream of going to Cannes, and those who dream of crossing Au Relais des Trois Epis’ threshold.

As usual, I took inspiration from Ferber’s combination of flavors, which is simply ingenious, like all her recipes. But I followed my own technique for the process, using a lot less sugar compared to the amount suggested in the book.
It may be a winter kind of jam, but by now I guess everyone knows that "The coldest winter I ever saw was the summer I spent in San Francisco". And if it's Mark Twain who says so...


Kumquat Jam
with Apple and Pink Grapefruit


kumquat, net weight after cleaning 1,200 gr. circa
apple, net weight about 1 kg
pink grapefruit 4
sugar 1 kg.
lemons 2


Quarter kumquats and discard the seeds. Peel apples and cut them in pieces. Peel grapefruits, discard the white membrane, cut into slices about 1/4" thick and then cut in pieces, discarding any seed.
Mix fruit with sugar and lemon juice. Pour everything in a large bowl, cover with plastic and refrigerate overnight. The next day cook the jam until it reaches the desired texture, skimming when needed. Pour it into properly sterilized glass jars, cover with lids and boil them for 20 minutes. Let jars cool down in the same water to create vacuum.

Confessions of a Bloghaolic

Wednesday, July 29, 2009
Tomatoes

I was diagnosed with a new desease. So I might as well come out of the closet: Yes, I blog.
Here are ten symptoms (give one or take one...) to understand if you too are affected by severe blog-addicition.

• Your collection of flours has exceeded by far that of your shoes;
• If it's not Himalayan pink salt, you start turning up your nose at it;
• In your desktop's folders the pictures of cookies, muffins and soups poured in small glasses are way more than those from your vacations;
• You're used to eat cold steaks and re-heated spaghetti, because it's forbidden to consume your picture's subject before you've portrayed it just right;
• You can talk all day about yeasts and jams with people from all over the world, whom you've never met and yet you consider your friends simply because you share the same recipe for pastry dough;
• Every time you eat at a restaurant, you feel an uncontrollable urge of replicating the dishes in your own kitchen and your friends can't stop you from shamelessly asking the waiter if he, by any chance, could pass you the recipe for that wonderful souffle';
• You always cook for an imaginary guest as well: the extra serving will be the victim of your photographic manipulations;
• The alarm can go on forever when it's time to go to work, but you don't have any problem to get up at dawn to knead your bread or - even worse - to shoot last night's leftovers, making good use of early morning light;
• Your heart skips a beat every time you see green walnuts in hulls at your favourite Farmers' Market;
• You often find yourself doing strange things, like talking to meatballs, petting tomatoes, begging the sponge cake or dancing with a bottle of balsamic vinegar;
• To you, world can be divided in two groups: those who make carbonara sauce with cream, and those who make it as it should be;
• You take care of your yeasts with motherly love and you wake up several times at night thinking you've heard them reproducing;
• You've tried to make your own bread at least once in your life and you were sincerely moved the first time you baked a ciabatta;
• You fall asleep reading the last issue of Donna Hay and you keep at least five different cookbooks on your bedside table;
• You haven't bought any shoes or bags in months because you're still paying off your new Canon's installments;
• When they tell you that the above tomatoes (THEY ARE ORGANIC!) are defective and full of lumps, you take it personally;
• By the end of the weekend you feel exhausted and all you've done is a couple of boiled eggs.

Greetings from my kitchen.
Sara aka One Girl in The Kitchen

Irish Soda Bread

Sunday, July 26, 2009
Irish Soda Bread

Yesterday I happened to be in the Richmond district, in the North West corner of the city. I haven't been there very often, and the only things I could remember were the fog, which hits earlier and it's thicker than in the rest of the city, and the large Russian community, which explains the huge concentration of piroshki, blini and caviar for sale in all Geary Street's produce stores.
Jumping from Eastern Europe to Ireland has never been that easy: I could have never imagined that, tucked between an herring, a glass of vodka and a red beet soup, one could find one of the few Irish bakeries of the whole San Francisco, if not the only one. Excuse me, but where did they hide it all these years????!!!?? One must be really careless not to see it, since with its bright green entrance, 
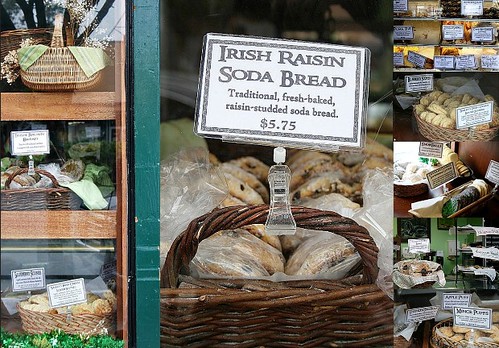
John Campbell's Irish Bakery is very difficult to ignore. Careless to say the least....

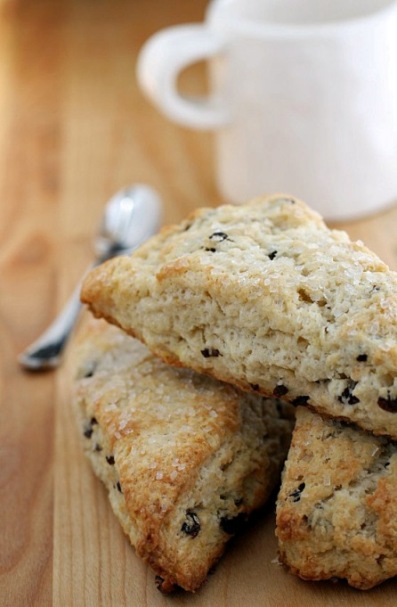
Among the products that grabbed my attention, the myriad of little pies, all with SUPER EXTRA perfect edges, some Baileys scones that would give me a buzz at the first bite, and, of course, the legendary Soda Bread, the traditional buttermilk Irish bread (and then, since we're still in San Francisco, I couldn't help noticing the focaccia bread, which I think is not properly Irish, but I could be wrong...).
I've immediately remembered this recipe that I had tried years ago from J. Hamelman's book on bread, Bread: A Baker's Book of Techniques and Recipes, which is sort of a Bible for all those who like kneading some dough. And I've also remembered that in order to make it right, one would need a special whole-wheat flour, genuine Irish, which is impossible to find here. I had the nerve to ask the saleswoman if they could sell me a little of that flour, like if I didn't have already a wide collection, with my all-purpose, type 0, pastry flour, bread flour, whole-wheat, whole-wheat pastry flour, corn, extra-fine corn, semolina, garbanzo beans and chestnut flour (and I'm sure I'm missing something here...). No, I'm sorry, it's not for sale. Perfect, I love this bakery even more and I can even forgive them the olive focaccia. I bow to their expertise, buy a couple of shortbread cookies, simple and fragrant, and I walk away with a new challenge in my pocket.

Hamelman, who's lived and worked in Ireland for few years, warn us that it's practically impossible to reproduce Irish Soda Bread on the other side of the ocean, both because there is no proper flour, and because the buttermilk we have available is only a poor imitation of the Irish one, tangy, full of flavor and fat from those green-pastured cows. Ehi, it wasn't me who said so! And yet, it's Hamelman himself who gives us a couple of tricks that can yield a quite satisfactory result: the first is to use a mix of whole-wheat flour and coarsely ground wheat flakes (that can somehow substitute the Irish whole-meal flour); the second is to substitute approximately 20% of our buttermilk with an equal amount of yogurt or sour cream.
A patch here and a patch there, and we have our own version of Irish Soda Bread. After all, if John Campbell from Belfast is selling me focaccia by weight, I think I'm allowed to make his bread, don't you think?
And it's still Hamelman, God bless him, who comes to rescue me with a footnote below the recipe. When I read his words, I almost wanted to catch a plane and go visit him in Vermont to thank him in person. I know I'm going into a difficult subject and the arguments can't be reduced to few lines, but, even if I like to experiment in the kitchen, I'm fundamentally against the modern philosophy of having everything of everything everywhere. It's what I call ubiquitous strawberry. Not only strawberries, but also grapes, pineapple, blueberries and peaches available all year round: it sounds like the description of the Garden of Eden, instead it's today's reality, to me not exactly heavenly. I'm against the ubiquitous and universal strawberry, just like I'm against burrata cheese in Chicago or Sicilian granita in Bormio (small village in Northern Italy). Yes, you can make it, but please don't call it Sicilian granita , the same way they call Parmigiano that plasticized cheese from Chile, or Mozzarella that sort of processed cheese that never goes bad. Ehm...forgive me...I'm digressing here. To go back to our subject, I'd like to finish off with these words, about our Irish Soda Bread: "In a way, I'm glad we can't quite duplicate the bread here; like the Guiness, it's somehow right that soda bread can't simply cross the ocean and still be as good as it is in Ireland herself".
(J. Hamelman, Bread, p. 264)

John Campbell's Irish Bakery John Campbell's Irish Bakery
5625 Geary Blvd.
(between 20th & 21st Avenue)
San Francisco, CA 94121
Tel: (415) 387-1536


Irish Soda Bread
for one round loaf of approximately 500 gr.

pastry flour 200 gr.
whole-wheat flour 30 gr.
wheat flakes 70 gr.
milk powder 12 gr.
sugar 1/2 teaspoon
salt 3/4 teaspoon(3 gr.)
baking soda 1 and a 1/2 teaspoon (8 gr.)
baking powder 1/2 teaspoon
buttermilk 265 gr.
(or 190 gr. buttermilk and 75 gr. yogurt or sour cream)


First of all, grind wheat flakes in a food processor, without turning them into powder, but keeping a coarse texture (I didn't have to do it, since the ones I bought were already good to go).
In a large bowl mix all dry ingredients together. If you're using yogurt (or sour cream), add it to the buttermilk and stir well until the mixture is smooth and homogeneous.
Pour buttermilk over flour mixture and mix lightly for few seconds. It's good enough when the dough comes together and forms a ball. It's not necessary to work it too hard (remember the old muffin rule?). You can make it by hand and without a mixer, because it's nothing like a traditional bread, being more like a compromise between bread and muffins' or scones' dough.
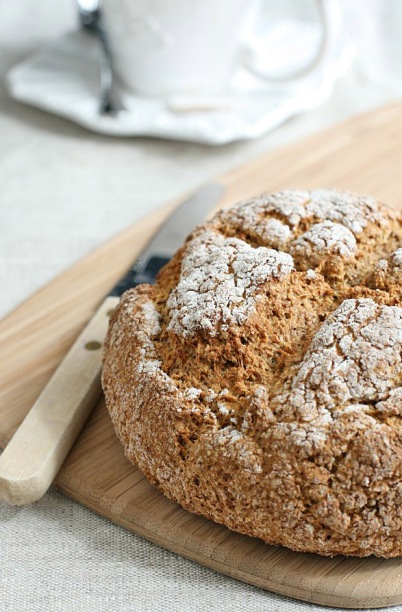
Turn the dough onto the work surface, dusted with flour, work it to give it a round shape and gently flatten it to eliminate any air pocket inside. Dust its surface with flour, transfer the bread to a baking sheet lined with parchment paper, and divide it with two perpendicular cut, pushing the blade about 80% of the way down.
Bake it at 475 for 15 minutes, then lower the temperature to 450 and bake for another 15 to 20 minutes. You will get a nice golden crust. If the bread is still pale along the cuts, it means that it's not fully cooked. If that's the case, keep baking it for few more minutes. Let it cool on a rack before slicing.
Irish Soda Bread should be eaten the same day. You can freeze it, or keep in a paper bag for few days, then slice it and lightly toast it before eating.

Plum, Raspberry and Rosemary Jam

Thursday, July 23, 2009
Plum Jam with Rasberry and Rosemary

Since few years ago, the process of making jam at home and canning fruit and vegetables in general was intimidating. I remember clearly when my aunt used to simmer her own jam in a huge steel pot, so big that today it wouldn’t even pass through the door of my tiny kitchen. Every year towards the end of the summer she would buy large crates of peaches, apricots and plums, and prepare tons of jars that would last until the following year. The whole process would take her at least two days and it always seemed an impossible task to me. Not to mention the fact that I had no clue on the proper procedures to sterilize the jars, and I was afraid that even if I would eventually be able to make the jam, it would be useless because then I would have to face bacteria and molds.
Until one day I had a sudden revelation: to make jam you don’t need to buy 40 pounds of fruit and a human-size pot is perfectly fine. To tell you the truth, it’s even better to make small batches at a time, because you’ll get better results. It’s almost the same enlightenment I had with egg fettuccine. If you think about it, it doesn’t take long to make them, but for years the memory of my grandma working half a day in the kitchen just to roll out the dough has held me back. Obviously, when you have three generations of relatives over for lunch, it becomes quite a project, but with two simple eggs, how difficult is that?

My first trial was an orange marmalade, English style, with the whole peel inside. Absolutely delicious. And it was love at first sight. The entire process is just wonderful, from choosing the right fruit at Saturdays’ Farmers’ Market to the aroma that spreads all over the house while jam is on the stove. It’s a sort of country idyll in the middle of city traffic. The only downside is that it’s addicting: I haven’t even finished canning one, that I’m already thinking of the next combination of fruit. As a result, I don’t know where to store the jars anymore, and sometimes I wake up thinking I’m Grandma Duck!!

I owe this recipe to Daniela Cuzzocrea from the cooking forum of La Cucina Italiana (CI); as usual she is full of great ideas. I've reduced a bit the amount of sugar, since in general I don't like jams that are too sweet and I always try to use no more than 30% of sugar on the fruit's total weight. In addition, I usually add the peel of a couple of green apples, that I eventually discard once the jam is set. Being rich in pectin, they serve as natural thickener. When the jam is cooking, if I see that after 20 or 30 minutes it's still too liquid, I simply drain the fruit and keep it on the side, while the juice in the pot keeps boiling until it reaches the desired thickness. Then I throw in the fruit one more time, stir well and it’s done. This way I’m able not to overcook the jam, maintaining some of the fruit color and texture.
Breakfast is safe one more time : )


Plum Jam
with Raspberry & Rosemary


red plums 1.5 kg
raspberries 600 gr.
sugar 700 gr.
lemons 2
green apples (only the peel) 3
rosemary a couple of sprigs


Wash the plums, pit them and cut in small pieces. Put them in a large bowl together with the raspberries, add sugar and lemon juice and stir well. Cover with plastic and refrigerate overnight.
The next day, add apples' peel to the fruit, pour the mixture in a large pot and let it cook on a slow heat, skimming when needed, until jam reaches the desired thickness. Discard apples' peel, pour the jam in properly sterilized glass jars, cover with lids and let them boil in water for at least 20 minutes. Turn off the heat and let the jars cool in the same water to create the vacuum.

Without Yogurt, What Blog Would It Be?

Tuesday, July 21, 2009
Homemade Yogurt

I know that yogurt has been featured over a thousand times on food blogs from the whole planet, with lactobacilli fermenting from here to Byelorussia, but I felt somewhat compelled to write a post about it myself.
Yogurt has always been welcomed in my fridge, ever since I remember being tall enough to open its door and take a peak of what was inside. During college, when finals were getting close and all of a sudden we were forced to study like crazy to make up for all the months we had wasted lazing around, me and my friend Michela used to eat yogurt with granola and a sliced banana for lunch or dinner. When we reached the point where we only had little time left but the pages to read were still endless, two things always came to rescue, the big coffee mug with chocolate chip cookies and the yogurt on sale with Buy 2, Get 1 Free type of deal.
Since I moved to the U.S, I couldn't’t find anything similar to European yogurt, not even when the labels clearly stated so, seducing me with their European Style illusion. I kept searching for months, trying every new product that I found on the supermarket’s shelves, and every time it was a disappointment. Until I discovered the way to make it myself.

The process itself is quite simple; the tricky part is finding the way to keep the bacteria at the same temperature for few hours, until yogurt is set. A little imagination in this case comes in handy. I personally wrap the big jar in a towel and I put it in the oven, turned on at the lowest setting, but everyone can find their own strategy, like placing it inside a wooden trunk or on a shelf next to the heater. Obviously, you can always cheat and buy the proper tool, (to which, I have to admit, I also gave in for few months), but I think that making it all by yourself gives a lot more satisfaction, other than being way more romantic : )
Homemade yogurt? Yes, you can!

Homemade Yogurt
for approximately 8 8oz. jars

milk 1 gallon
plain yogurt 3 and a half tablespoons
(this will be your starter; use a store-bought yogurt the first time, then you can start using some yogurt from your own batch)


Put milk in a large pan and bring it almost to the boiling point. Let it cool off, stirring it every once in a while, until it reaches 104F (between 40C and 42C). It will take approximately one hour and I recommend using a food thermometer to check the temperature.
In the meantime, take the starter yogurt out of the fridge and let it get approximately to room temperature. Turn the oven on to low/warm setting or prepare whatever “bed” you decided to use. Place 3 and a 1/2 spoons of yogurt in a large jar with lid (which should be room temperature as well; otherwise you'll kill the poor bacteria because of thermal shock!).
When milk has reached more or less 104F, put about a cup of it in the container with the starter and mix well. Add remaining milk, stir, and close the jar. Wrap it with a blanket, place it in the warm oven and leave it there for 4-5 hours. At this point yogurt should be set (don’t worry, I promise you’ll understand right away whether the bacteria did their work or not).
Place it in the refrigerator until cold. You can eat it as it is or, if you like it firmer, you can let it drip on a fine sieve.
I personally like it very firm, Greek style, and I let it strain for two hours or more. And it comes out so dense that if you serve it topped with a couple of spoons of honey and some chopped walnuts, you can even pass it as an excellent dessert : )

Birthday Cake (Rum Cake)

Sunday, July 19, 2009
Birthday Cake (Rum Cake)
When I was a kid, I used to think that wind was made by trees, who collectively decided to move air around by shaking their branches. I used to believe that by the time you had grown up, you would get a new name, because to me there were names for kids, like mine and that of my brother and sister, and names for adults, like that of my parents and grandparents.

At four, I didn't think that one could long for a whole closet full of shoes, because the only thing I wanted was a pair of black lacquer ballerina flats. Back then I was sure that inside my grandma's clock there were two goblins throwing the pendulum to each other, like if they were playing table tennis, and sometimes I felt sorry for them because I knew they were really tired. I also used to think that on Saturday night it was required to eat pizza, and I used to believe that this one was the only cake possible. Certainly to me it was the best cake in the world.
The first time I ate it was here, a summer afternoon of many years ago, at a time when me, my brother and sister were still forced to have the same haircut. When our hair got too long, my mum would put a bowl on our head, upside down, trying to pair the edges with fine scissors' strokes.

Now that I see the cake again, covered with cream puffs or chocolate icing, I think that both of those variations must have been a lot tastier than this one. Yet, the version with whipped cream and sliced pineapple is the one I remember the most and to which I'm more attached. Maybe it's because me and my brother would always fight to get the pineapple juice that was left in the can, right after licking what had remained of the pastry cream on the wooden spoon.
Its name was Torta Margherita (literally Daisy Cake, it's Italian for Sponge Cake) and it was really special because my mum would always make it for our birthday (and for our birthday only). I know for a fact that if you ask my brother and sister which is the dish from their childhood that they remember with the most salivation, they will put this cake in the top three as well, along with the rabbit with salame and chicken liver and the white cannelloni we used to have for lunch on Sundays.

Few years ago I copied some recipes from the old family notebook and I stuck them in my suitcase. But I've never wanted to try any of them, whether because I was too lazy or because I felt some sort of awe. Up until today, when I finally made up my mind, and it was the best gift I could get.


Torta Margherita
for a 9" diameter round pan

For the Sponge Cake
sugar 150 gr.
vanilla sugar 1 package
(can be substituted with vanilla essence)
eggs 6
type 0 flour 75 gr.
potato starch 75 gr.
baking powder 1/2 package (about 1/2 teaspoon)
grated zest of one lemon
rum, sugar and water to moisten the cake


In a bain-marie, beat the eggs with the sugar and the vanilla sugar until the mixture gets white and firm. Remove from the stove and keep mixing until it cools off. Sift flour with potato starch and baking powder and add to the egg mixture along with the lemon zest.
Pour in the baking form, properly buttered and dusted with flour, and bake at medium temperature (350) for approximately 35-40 minutes.
When the cake has cooled down (it's better to do it the next day), sliced it in three layers and moisten them with some rum, diluted in warm water with a little sugar.


For the Pastry Creams
milk 1/2 liter
1 vanilla stick
sugar 150 gr.
flour 50 gr.
eggs 2
egg yolks 2
butter 25 gr.
grated zest of one lemon, cocoa

To Finish
fresh whipping cream 1 pint
confectioner's sugar 2 tablespoons
sliced pineapple in juice 1 can


Bring the milk to boil with the vanilla stick, scraping out the seeds. In a separate bowl, beat sugar with the eggs and egg yolks. Add sifted flour, mix well and then pour the batter little by little over the hot milk. Stir well and cook at low heat for about 10 minutes, always stirring.
Let it cool down, add butter and mix well until melted. Divide the cream in half and add the lemon zest to one half and a couple of teaspoons of cocoa to the other half. Fill the cake with the two creams, one per layer, and reassemble it.
Whip the cream with the confectioner's sugar until it gets very firm, then spread it evenly over the cake. Garnish with coloured sugar crystals and pineapple slices.

If you're interested, I'm copying here the recipe for the chocolate icing, exactly how I found it in the notebook.


For the Chocolate Icing
dark chocolate 1 bar
oil 1 tablespoon, scarce
water


Chop the chocolate bar and let it melt in a pan with a little water. Add a bit of oil and stir until mixture is fluid. Let it cool down, then cover the cake.
Easy, isn't it? : )

Tartine Bakery Scones

Monday, July 13, 2009
Tartine Bakery Currant Scones

Few weeks ago I've started running again, dreaming of New York, the sound of thousands of steps pounding Madison Avenue Bridge and the crowd crammed in Central Park, screaming at you.

One of my usual morning routes, specifically designed to avoid San Francisco hills, takes me through the Mission, and precisely at the corner between 18th Str. and Guerrero. Here is Tartine Bakery, a bakery/patisserie/cafe' that is absolutely one of the best things you can find in the city.
Those who know me know exactly how much I love this place. I truly believe that their frangipane croissant should be listed among the 10 reasons why life is worth living. French for ingredients and preparation, it's definitely American for its super-size, I think it must be around one pound, I'm not kidding. Those - rare - times I treat myself to it, I end up being sick the whole afternoon, yet I never regret it. Yes, it's THAT good!
I used to go to Tartine more often, but now that the place has become incredibly popular, one must be really persistent, if not suffering from withdrawal symptoms to be willing to wait in line over a half hour in order to grab one single croissant.
One of my little daily pleasures that I've rediscovered lately is running along Guerrero Street and start smelling that unmistakable scent of butter and cinnamon that spreads over two blocks. You cannot imagine how many times I had to resist the temptation of stopping right there and go directly to the counter to grab a brioche, all sweaty, hungry and unscrupulous.
Currant scones are a valid alternative to the infamous croissant. Buttermilk makes them very soft and the amount of sugar is really minimal, so that one can be truly deceived and think they are eating something light and with few calories. As long as you don't pay attention to the embarrassing amount of butter... yet, what kind of scones would they be otherwise? And then, everything is allowed after a 10-mile run, don't you think?

The recipe comes from their book, Tartine, which I remember buying the very same day it was published, so much I was waiting for it. By the way, I read that they're coming out with a second one, about bread this time, and I'm already on the waiting list!


Currant Scones
from Tartine Bakery

for 6 scones

all-purpose flour 340 gr.
Zante currants 50 gr.
baking powder 1/2 teaspoon
baking soda tip of a teaspoon
sugar 50 gr.
pinch of salt
butter 130 gr.
buttermilk 190 ml.
grated zest of one lemon
melted butter 3 tablespoons
large crystal sugar for sprinkling


Soak currants in warm water for about 10 minutes, drain and dry them really well. Sift flour in a large bowl with baking powder and baking soda, add sugar and salt and stir well. Cut butter (which has to be very cold, just taken out of the fridge) in small cubes, then mix them lightly with flour. You just want to barely mix them; the purpose is to get a coarse dough where butter pieces are still visible.

Add buttermilk, lemon zest and currants and gently mix with a wooden spoon. Mix until you get a firm dough. If it looks too dry, add more buttermilk, but pay attention to the butter, you must still be able to see pieces of it in the dough, this is how you get nice and flaky scones. Just like when making muffins, the secret of scones is to add wet ingredients to dry ones all at once and not to overwork the dough.

Dust the work space with flour, place the dough on it and pat it to form a rectangle approximately 5" wide and 1.5" thick. Brush the surface with melted butter and sprinkle with crystal sugar. Cut in 6 triangles, more or less of same size, place them on a buttered baking sheet and bake at 400 for about 25-35 minutes, until scones turn golden brown. You will get scones that are slightly crunchy on the outside, but very soft and buttery on the inside.
Let them cool on a rack, meanwhile get yourself a big cup of strong coffee, and enjoy the start of another beautiful day : )

I cut the original recipe in half. Scones give their best if eaten the same day. Otherwise, you can also freeze them and warm in the oven when ready to serve.

Chinese Tea Eggs

Saturday, July 11, 2009
Chinese Tea Eggs

It's not Easter and it's not even Chinese New Year. But I couldn't wait that long to try these gorgeous eggs. After all, I've read that in China they eat them regularly as a simple snack and millions of them are sold each day, not only in specialty stores but also in common markets and street food carts.
I remember seeing them here, soaking in big pots in some of the dim sum places in Chinatown. But to be honest, looking at deep brown eggs floating freely in a black liquid has always sort of scared me. I could have never imagined that hidden inside that dark wrapping one would find such a marvelous thing. Never judge by appearances...
Yet, I kept thinking of a special occasion for this photogenic dish. And why not? I decided I want to celebrate my almost new born blog, which is approximately, about, more or less one month old!
Congratulations and a sincere thank you to those of you who support me.


Chinese Tea Eggs

eggs 6
soy sauce approximately 1/2 glass
black tea leaves 2 tablespoons
salt 1 teaspoon
sugar 2 teaspoons
cinnamon stick 1
star anise 3
cracked peppercorns, orange zest, gingerto taste


Put eggs in a pot with enough water to cover them. Bring to boil, then let cook for 3 minutes.
Remove eggs from the pan, keeping their water, and cool down by placing them in a large bowl filled with cold water.
Crack the eggshell by tapping gently with a knife. Tap until the shell is fragmented all over, but be careful to keep it intact. The more you're able to fragment the shell, the deeper the marble effect.
Add all other ingredients to the cooking water, stir well and place the eggs back in. Bring to boil one more time, lower the heat and cover with lid. Simmer for 1 to 3 hours, adding more water if needed to keep the eggs always covered. The longer you let them simmer, the more intense their color and flavour. I reached a sort of compromise, simmering for approximately one hour and a half and then letting them soak in the same water overnight.
I was really curious to try them and I've been pleasantly surprised with the spiced and peculiar taste. On the side, I made a salad with thinly sliced white cabbage, dressed with toasted sesame oil, soy sauce and white vinegar, and sprinkled with a generous amount of black sesame seeds.

Shades of Red

Thursday, July 9, 2009
Raspberry Vinegar

My mom used to say that red looked good on me and when I was a kid I was drowning under cherry-color clothes: socks, jumpers and even hair pins.
Maybe this is why even today I instantly fall in love with anything that has even the slightest hint of pink or red. Strawberries, raspberries, cherries. But also cranberries, the Red Velvet Cake, poinsettias and that old FIAT 500 that drives around San Francisco with a California plate. Up to the LV Neverfull bag with roses and the HP mini notebook designed by Vivienne Tam (these last two luxuries are a recent discovery that a temptress friend pointed out to me. I still have to convince myself that one can live without them... : )

You'll find raspberry vinegar quite often here, used as a condiment for salads. To be honest I like it thousands times better than any other kind of creamy dressing of ambiguous colors. Its gorgeous color and sweetish taste go very well both with a simple mixed greens-arugula salad and with fancier creations like the watermelon-feta mix or those yummy salads with caramelized nuts and goat cheese.
When I realized this vinegar is very easy to make on your own, I didn't think twice. I'm a sucker for these recipes-non-recipes. And you know what, now that I think of it I'll even create a new category for them. Recipe-non-recipe: minimum labour, maximum satisfaction : )
And then, don't you go crazy for this color as well?


Raspberry Vinegar
for approximately 1 liter

white wine vinegar 1 liter
raspberries 2 packages
pink or black peppercorns to taste


Choose ripe but firm raspberries, wash them carefully and pat them really dry. Mix them with the vinegar and few peppercorns if you wish. Put in a container and let rest for one month in a cool place. Stir every 3 or 4 days, to mix the fruit better.
When it's ready, strain, discard the raspberries and pour in a bottle.

Orange Scented Ricotta Gnocchi

Tuesday, July 7, 2009
Orange Scented Ricotta Gnocchi

Give me some fresh cheese and you'll make me happy. Ricotta, crescenza, mozzarella, stracchino, I like everything that is white, soft and creamy.
When I was a kid, my fridge at home was always full of aged cheeses, XTRA aged I'd say, the very rich ones, with a strong taste and an intense smell, so to speak....Instead, I would often dream of crossing a river of milk riding a mozzarella, can you imagine? Or wandering through the sky on a soft cloud, just like Heidi (for those of you who don't know, she's a famous cartoon character), only, my cloud was made of crescenza and was resting upon a slice of bread.

I like these gnocchi because they are very delicate. And on top of that, it takes very little time to make them, they are really easy and the dough is not sticky at all, that way you won't have to spread flour all over the place. But the best part is that they are always a success, they come with a warranty certificate.
Unlike potato ones, which - I don't remember how many times now - came out like little pieces of stone or, even worse, magically vanished right after I put them in boiling water.
These gnocchi instead never betray you. Satisfaction guaranteed!


Ricotta Gnocchi
with Orange Zest

for 4 people

fresh ricotta 500 gr.
egg yolks 2
grated parmigiano cheese 3 or 4 tablespoons
flour, as needed
small oranges 2
butter, salt, nutmeg, sage, smoked ricotta to finish


Let ricotta drain overnight on a fine sieve or wrapped in cheesecloth.
When it's nice and dry, put it in a large bowl, add yolks, salt, grated orange zest, nutmeg and parmigiano cheese to taste. Mix well, then start working the dough with flour, adding just enough to make it firm. Do a test by cooking a couple of gnocchi in boiling water, and check if they hold up. If needed, add more flour.
Divide the dough in pieces and roll them out to form long skinny logs, cut them in 1-inch long pieces and mark them with a fork or using the proper tool (you don't have to, but when gnocchi have lines on the surface, they retain the sauce better).
Cook the gnocchi in boiling water and strain them right after they come back to surface. Dress them with brown sage butter and sprinkle with smoked ricotta.

4th of July Tart

Saturday, July 4, 2009
Tart with Mixed Berries and Frangipane Cream

The first time I came to the US I was 12 year old, it was summertime and I stayed one month with a host family in Detroit. There I spent my first 4th of July; apparently we were on a boat watching the fireworks, but the only thing I remember is that I got really sick because I had eaten too much caramel popcorn.
When they invited me to a barbecue for Independence Day few weeks ago, I couldn't make up my mind on what to bring. All I could think of were huge colored bins, with overflowing popcorn in white, red and blue.

Finally yesterday I had a sudden inspiration and I literally ran to buy all the ingredients. Even if all sorts of accidents happened during the work in progress (I forgot the milk on the stove while making the pastry cream, the electric mixer sized up on me out of spite, the electricity decided to stop working right when I had the tart in the oven), eventually I made it and I was able to get rid of the popcorn ghosts.
Happy Fourth of July!


Mixed Berry Tart
with Frangipane Cream

for a 9" diameter tart pan

For the Tart Dough
flour 250 gr.
sugar 100 gr.
butter 100 gr.
eggs 1
baking powder 7 gr.
a pinch of salt


I always make the tart dough using the recipe from the Simili Sisters (in Italy they are like the rock stars of anything kneaded, two sweet twin ladies that holds baking classes all over Europe). And even this time that I wanted to try the more tender version, which is better as a base for cream and fruit tarts, they did not fail.
Sift flour and baking powder on the table. Take butter out of the fridge, cut it in small pieces and rub it with the flour using your fingers, until you get a crumbly dough.
Make a dwell in the middle and put sugar, egg and salt. Beat lightly with a fork, then start mixing them with the flour using a spatula. Work the dough until it gets smooth, trying to be as quick as possible so that it won't get warm. Wrap in plastic and let it rest in the fridge for at least two hours before using it.


For the Frangipane Cream
butter 80 gr.
sugar 100 gr.
almond flour 100 gr.
eggs 2
flour 40 gr.
almond extract 1 tablespoon


Beat eggs with sugar until they get fluffy, add butter cut in small pieces and keep mixing at high speed. Add flour, almond flour and extract and mix until the cream is smooth. Refrigerate until ready to use it.


For the Pastry Cream
(Recipe by Pierre Hermé)
milk 500 gr.
egg yolks 4
sugar 75 gr.
corn starch 3 tablespoons
half vanilla stick


Warm the milk with the vanilla stick, after opening it in half and scratching out the seeds. Turn off the heat and let it soak for at least half hour. When you are ready to use it, bring the milk back to boiling point.
In the meantime, beat yolks with sugar and corn starch until fluffy. Temper the egg mixture with a couple of spoons of hot milk, whisking quickly so that eggs won't cook. Slowly add remaining milk, and keep stirring. Strain the cream back in the pan, and discard any lump. Cook at medium heat and keep stirring until it starts boiling. Keep cooking for another 2 minutes, then turn the heat off and cool it off quickly by putting the pan over a bed of ice. Keep stirring until completely cold, it will take about 5-6 minutes. Cover with plastic and keep it in the fridge until ready to use.


To Finish
mixed berries
(strawberries, blackberries, blueberries, raspberries)

apricot jam, powdered sugar


When you are ready to bake, roll out the dough and place it in the baking pan, cover with parchment paper and put ceramic weights on top (you can also use some dried beans instead), so that the crust won't rise as much while baking. Bake for 15 minutes at 350, take out the weights and parchment paper and cover the crust shell with a thick layer of frangipane cream. Put back in the oven and bake for about 30 minutes more, until crust and cream turn a nice golden color.
Let it cool completely, then spread a layer of pastry cream and arrange the berries on top, creating circles of alternating colors.
In a saucepan, heat some apricot jam with a couple of spoons of water. When the jam is hot, brush it on top of the berries to make them shine. Finally, sprinkle the tart with a little powdered sugar.

Avocado, Mango and Shrimp Salad

Wednesday, July 1, 2009
Avocado, Mango and Shrimp Salad

How delicious avocado is! I certainly list it among the best contributions of California to modern society, along with Apple, Levi's and Brad Pitt. Who cares if neither Brad Pitt nor avocados are originally from California, that is just a subtlety. California owns about 80% of US avocado market and fruits grown here are available 12 months a year. Sweet! As for Brad Pitt, do I need to say more?

Browsing the net, I found out that the name comes from Spanish explorers who ventured in Central America. Since they weren't able to pronounce Aztec word ahuacatl, they called it aguacate, from which comes the word guacamole. The most curious thing is that the Aztec ahuacatl meant testicle, and the fruit was called that way because of its shape....!!??!!? I'd say.....let's discuss this!

Even mangos, which are available in produce stores all year round, are one of the reasons why I can forgive this part of the world for not having a decent pizza and for having crafted a pink salad dressing.
Mango is delicious by itself, but I also love it in savory dishes. It's very nice in chicken sandwiches, great in Mexican salsa, or even as a side for certain types of fish and crustaceans.

But avocado and mango together, they are a blessing! Maybe it's because they have a very similar shape, or because they both have a large pit inside, or maybe it's their pastel color, I don't know, but to me they are simply made for each other. In short, almost like me and Brad Pitt....


Mango, Avocado & Shrimp Salad
for 4 people

ripe avocado 2
mango 1
shrimp 8
lime 2
shallots 2 or 3
salt, pepper, olive oil, fresh cilantro


Clean the shrimps, removing their head and taking them out of the shells. Discard the black vein, but leave the tail. Or, do like I did and buy them already cleaned ; )
Steam them for few minutes until they turn a nice pink color. Cool down by placing them on some ice cubes, and set aside.
Peel the mango and cut it into small cubes. Cut avocados in half, discard the pit and scoop out the inside, leaving some of the pulp attached to the edges of the skin. Cut the flesh in small cubes and add them to the mango along with the shrimps. Dress with lime juice, sliced shallots, salt, pepper and olive oil to taste.
Place salad inside the reserved avocado shells, sprinkle with minced cilantro and serve immediately.