Home About me All the recipes. More or less organized Inspiration Wanna send me a note? Italian version

Spaghetti with Bell Peppers and Pine Nuts

Monday, June 29, 2009
Spaghetti with Bell Peppers and Pine Nuts

Here is a very quick recipe that really tastes like summer. Since it's been unusually hot these days, I thought it would be better to take advantage of the moment : )

I learnt how to make these spaghetti from my aunt, the one and only Aunt Andreina, who during the years has become THE Foster Aunt of several friends as well. That's because when one has a problem, she's always there to open her own Confessional, as she calls it...
To tell you the truth, she doesn't make them very often, because she really is the queen of the pasta sauce with fresh cherry tomatoes, and it's hard to give up that one, even for one single day. I wish you could give it a try! For years, I've tried to replicate that sauce, but - who knows why - it never came out quite the same. Maybe it's because of Cortina's tomatoes (ehm...), maybe it's the oil or the bread she uses to make scarpetta (can't translate this one, you know what I mean, right...?). Or maybe it's simply because I don't have my uncle singing Lucio Battisti while pasta is cooking.
These spaghetti instead always come out just like the originals. Tasty, nice to look at, colorful, and even very fast to make, what else can you ask for?


Spaghetti with Bell Peppers and Pine Nuts
for 4 people

bell peppers of different colors 4
pine nuts 2 tablespoons
spaghetti 320 gr.
garlic 2 cloves
olive oil, salt, pepper, fresh parsley, parmigiano cheese


Cut the bell peppers in large pieces. Place them in a large pan together with a generous amount of olive oil, the garlic cloves cut in half, salt and pepper (if you wish, you can also add some crushed red hot pepper). Let them cook at high heat for few minutes, then cover with a lid and keep cooking at a lower flame until bell peppers are tender (it will take about 20 minutes). In the meantime, toast the pine nuts in a separate pan. Drain the spaghetti al dente and saute' them for one minute in the pan with the bell peppers, adding the pine nuts and some fresh minced parsley. Serve, dusting with grated parmigiano cheese.

Flourless Chocolate Pecan Cake

Sunday, June 28, 2009
Flourless Chocolate Pecan Cake

This cake is one of the first memories I have of my Californian experience. It was back in 1999, I had just graduated from college and I decided to come to San Francisco, unaware of the consequences (because after 10 years I am still here!). To be precise, in the beginning I was staying in Berkeley at a friend's house. And to finance my "vacation", I found a job in a coffeshop on Shattuck Avenue.
It was the dot.com boom era and people were not afraid to spend money. Trendy restaurants and specialty stores were popping up like crazy, young millionaires with no cash flow were competing with each other on who was able to indulge on more daily luxuries, edible and not.
This unusual store opened right in the middle of this euphoric climate. It was a Pastificio, specialized in making fresh egg pasta of any possible flavour and color, Meyer lemon, cocoa, lemon and black pepper, habanero pepper, blueberry, tomato, and 100 other flavours that I don't remember anymore. And people were lining up, ready to pay even $10 for a pound of pasta, something that would not happen today.
Aside from the pasta shop, they had a breakfast counter, and they used to bake bread, sweets and cookies to fall in love with. I've never had a better olive bread or cinnamon roll. Let alone the chocolate chip cookies or the almond paste torte.

A couple of years ago I happened to be in Berkeley and I walked by Shattuck Avenue, hoping to buy a loaf of bread and some dried tomatoes packed in olive oil. But there was no sign of the old Pastificio, it sunk with the economic crisis of the new millennium. What a shame.
Luckily, I was able to save few recipes that I learnt here and there just by watching my "colleagues" at work. This cake, they would make it every day, and it was always a hit, long before the gluten free trend. Back then one would simply say flourless instead.
No flour, but lots and lots of chocolate! : )


Flourless Chocolate Pecan Cake
for a 9" diameter round pan

butter 1 stick (115 gr.)
chocolate with 70% cocoa 120 gr
eggs 3
pecans 200 gr.
sugar 100 gr.
vanilla extract 1 teaspoon
pinch of salt


Melt butter and chocolate in a double sauce pan over boiling water, let it cool down and then fold in the eggs, one at a time, salt, vanilla and sugar. Beat well with the mixer. In the end, add pecans, lightly toasted in the oven and fine ground. Pour the dough in a round pan, buttered and dusted with flour, and bake at 350 for about 40 minutes.
Let it cool on a rack, dust with powder sugar.

Watermelon Agua Fresca

Friday, June 26, 2009
Watermelon Agua Fresca

...aka take away summer.
Watermelon is one of those things that always gave me the idea of summer, more than coconut, ice cream and flip flops. Even when I was living in Cortina, where summer is short and definitely not very hot, when I found a big watermelon in the fridge, sometimes even already cleaned and cut in pieces, I could almost hear the sound of the sea, and I would instantly find myself lying on a beach with skin covered with oily Coppertone!

To tell you the truth, I have to spell out something here. It's my brother - who's always been very picky on these things - who would go to the trouble of cleaning, peeling and cutting in pieces large watermelons, so that he would find them in the fridge all nice and ready to bite. And this to his own disadvantage, because after he did all the work, his sisters, cousins and friends would rush eating it and would not leave much behind for him....
In San Francisco, ocean currents and constant fog leave very little space to imagination: I dare you to go to Ocean Beach in a swimming suit, even though - who knows why - my friends in Italy think that I live on the sea : )
And yet, even here during those days in July when the wind is so strong, a nice and ripe watermelon makes me think of a Mediterranean summer, a tanned skin and the sound of light waves.

Agua fresca is a nice and quick way to have summer always at hand, or rather in a glass....(yeah, try taking a watermelon with you all the time, it's not that easy...), even if calling it a recipe is a little too much.
I found out about this drink while walking around the Mission, it seems like it is very popular in Mexico and Central America. You can also make it with papaya, cantaloupe or strawberries. And it will last for few days in the refrigerator, unlike Kristian's watermelon, which always disappeared in a flash!


Watermelon Agua Fresca
for approximately 1 liter

ripe watermelon, peeled and cut in cubes 500-600 gr.
water 1/2 liter
sugar 1-2 tablespoons
lime juice 2-3 tablespoons
mint leaves for garnish


Mix watermelon, sugar and lime juice and blend them until you get a smooth juice. Add water and strain through a fine sieve. Let it cool in the fridge for at least one hour before serving. Pour over a glass filled with ice and garnish with some fresh mint sprigs.

Food Inc.

Wednesday, June 24, 2009
Food Inc.

Somebody once said We are what we eat. Does it still apply if we don't know what we eat anymore?

Food Inc. is not a first date movie, especially if you've planned to go out for dinner right after. The movie is hard to digest and helps raising some questions on the limits that we have to put to the evolution of the current economic system.
I don't want to talk about the millions of chickens that are raised to get fatter, kept alive for exactly six weeks without ever seeing sunlight, crammed one against the other into big containers, unable to move, so fat that often they can't even stand up and their bones crack because they can't bear such an unnatural weight.
I don't want to talk about the cattle led to slaughter in a way that is not only inhuman but also dangerous for our own health and hazardous for the workers due to the lack of safety rules.
I don't want to tell you about the workers that are recruited illegally and paid next to nothing in order to reduce cost and allow the fast food giants to offer $1 meals on their menu. I don't want to tell you about those families who live on McMeals because it cost less to buy four cheeseburgers than two pounds of carrots.
I don't want to remind you that the population is increasingly afflicted with obesity, malnutrition and diabetes because of a diet largely based on corn, which, as corn syrup, is listed as ingredient in 80% of the products we find on the shelves.
Instead, I want to advice you to go see it yourself, but remember, do NOT buy pop corn, because you won't be able to eat it - guaranteed.

If you want a ehm...taste...of the movie, watch the official trailer here.

The Miracle Bread

Tuesday, June 23, 2009
No-Knead Bread

After putting it in a corner to wait for better times, I finally had the chance to try this recipe that about 2 years ago has started spreading like crazy through foodblogs from all over the planet.
Now I wonder why it took me so long to venture into this experiment, since it seems like I can't live without this bread anymore. Oh, yeah, I remember, it must have been because after moving BY MYSELF (yu uhhhhhh!), I lived several months without pots, pans, measuring tools or gadgets of any kind. I had thought that maybe it was more urgent to get a bed, a mattress and a couple of chairs (to tell you the truth I managed to add a pair of boots to the list of things that I needed to buy with maximum urgency, but this is another story...)

Flour, water, salt and yeast, a couple of swirls with your hand, sbam! Done. The rest of the job it's the bread that does it by itself, so I'll have more time to go to the movies or to do some more shopping : )
The credit of spreading this miraculous process through the ether goes to Mark Bittman, aka The Minimalist. He's the one who published it on the NY Times, adapting it from Sullivan Street Bakery in NY. From there the recipe took a life of its own, and the NKB (No Knead Bread) has come out of the oven in Manhattan and Portland, passing through Naples, Cordoba and San Paolo, to finally land in my tiny studio on 30th Street, Noe Valley, San Francisco.

You can find the video with the explanation here. Enjoy the show.


No-Knead Bread
for 1 loaf of about 750 gr.

all purpose flour 430 gr.
water 345 gr.
salt 9 gr.
instant dry yeast 1 gr.
cornmeal or wheat bran for dusting


First of all, check your appointments for the next day and make sure you plan them around bread time. This is the most difficult part, the rest, as it's been pointed out many times before, is so easy even a four year old kid could do it.

In a bowl, mix flour, salt and water. I've used a third whole wheat flour and two thirds white flour. You can change the proportions, but keep in mind that whole wheat flour rises less and makes bread more dense. Next time, I will try to increase the quantity of whole wheat flour and see how far I can go to still get nice holes in the crumb.
Add water and briefly mix with your hand until everything is incorporated, but DO NOT KNEAD (otherwise, what kind of no knead bread is it?).
Cover with plastic and let it rise from 12 to 18 hours, depending on the room temperature. The dough will be wet and sticky, with bubbles all over its surface.

The next day, shed the dough on a cotton towel generously dusted with cornmeal or wheat bran, or a combination of the two (you can also add other kinds of seeds of your choice, like flax or fennel). Fold the dough as shown in the video, flip it so that the seam faces down, dust with more flour, cover with the towel and let it rest for another two to three hours.
Preheat the oven and the baking dish (preferably use a cast iron one, but pyrex will be fine as well) at 450, both need to be piping hot when you are ready to bake.
Using the cloth, flip the dough in the pan very quickly, so that the seam faces up, cover with the lid and put the pan in the oven. After 30 minutes, take off the lid and keep baking for another 15 to 30 minutes until you get a nice brown and crunchy crust. Let it cool on a rack before slicing.
Spread it with jam, bite and congratulate yourself : )

After All It's Just a Chicken...

Saturday, June 20, 2009
Zuni Cafe Roasted Chicken

...right? Wrong. It's ZUNI CHICKEN.
For those who live in San Francisco and surrounding, 
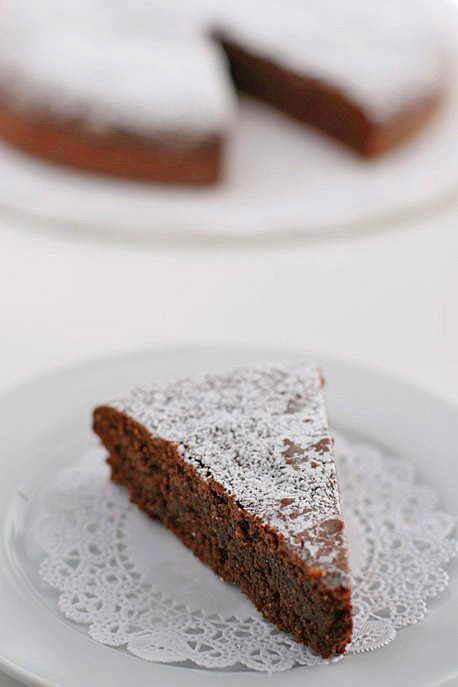
Zuni Cafe is an institution, one of those places you can go 1,000 times and yet, right when the espresso comes, you already dream of the day you'll afford to go back. It's not only for their menu - because if you think about it, they are famous for a roasted chicken and a salad! - but it's for the passion they put into preparing your food, their love for sustainable, local and seasonal ingredients, for their open kitchen where the chefs don't have ANY single spot of sauce on their uniform, for their rustic bread, so fragrant and crunchy, for the impeccable yet unpretentious waitstaff, for their deep knowledge of the history of all ingredients that go in your dinner - from the type of olive oil mill to the origin of the cocoa beans that go in the chocolate cake; it's for the people that seat at the table next to you, who instantly become your friends just because you exchange opinions on the ricotta gnocchi, it's for the wide windows that look above that theater that has become Market Street, for those stairs that lead to the second floor, and yes, so that you too can say....I've been there.

Since I tried it the first time, I've always wanted to replicate the recipe for Zuni Roasted Chicken at home. I have to admit, though, I am super lazy and the 20+ pages of meticulous description of the process, as they appear in the Zuni-Bible have always turned me down. Whaaaaaat? If it takes me 4 hours just to read the recipe, it will take me at least 3 days to execute it, and all this for a damned chicken!
That is correct, one of the secrets is indeed to plan in advance and let the bird rest in the fridge all naked - well, almost... - for one to three days, so that the meat can absorb all the aroma from the fresh herbs.

Last week I really set my mind on the project, I printed tons of pages on Zuni's chicken and I totally committed myself. I had also promised my pot friend Irene (pot being the pan and not the weed...) that I would confront the chicken one day and I would transfer the recipe overseas. You have to keep your own word, so they say.
The chicken is really excellent. The recipe is very simple after all (despite its lenght...), just follow this simple advice: in order for it to come out just right, you have to select and treat the ingredients with love, Zuni style.


Zuni Roasted Chicken
for 4 people

1 small whole chicken approx. 3 lb.
rosemary, thyme,sage 4 sprigs each
salt, pepper
country style bread, stale 8 oz.
currants 1 tablespoon
pine nuts 2 tablespoons
olive oil, white or Champagne vinegar, red vinegar
garlic 2 or 3 cloves
scallions 4
arugula or frisee a couple of handfuls


Prepare the chicken (at least one day in advance, better if 2 or 3), discarding any fat lump from the inside, rinse it and pat it dry, inside and outside. It is important that the chicken be really dry, because if it stays wet, the water will take too much time steaming before the skin can actually start turning brown.
Using your fingers, make a little pocket under the skin of each of the breasts and thighs, and insert one sprig of each of the herbs. Sprinkle the chicken with salt and pepper, cover with plastic and refrigerate.

For the bread salad, discard all the crust, cut the bread in slices approximately 1" thick and then cut them in big chunks. Brush with olive oil and broil for few minutes, turning them on each side so that the surface turns golden brown.
Make a vinaigrette with 1/4 cup of oil, 1 1/2 tablespoon of white or Champagne vinegar, salt and pepper. Toss the bread with one quarter of it and set aside. You can also prepare this few hours in advance. Moist the currants with 1 tablespoon red vinegar and 1 tablespoon warm water and set aside.

Preheat the oven to 475 (exact temperature will depend on the size of the chicken). Warm the roasting pan by placing it in the oven for about 10 minutes, then place the chicken in it, breast-side up, and put it in the oven. Check it after 20 minutes, if the skin hasn't started browning yet, raise the temperature by about 25 degrees; if instead it is too dark and the fat has started smoking, reduce it accordingly. After about 30 minutes, turn the bird over and let it cook breast-side down for another 10-20 minutes. Turn it again and keep roasting for 5-10 minutes longer (total roasting time will be anywhere between 45 minutes and 1 hour).

In the meantime, slightly toast the pine nuts. In another pan, heat a tablespoon olive oil and briefly saute the slivered garlic and scallions, without letting them turning brown. Add pine nuts, garlic and scallions, and drained currants to the bread salad. Drizzle with one tablespoon of water, taste and eventually add more salt and/or vinegar. Keep it warm (you can also place it in a baking dish and put it in the oven with the chicken during the last 10 minutes).

When the chicken is ready (you can test by checking the juices that are released, they have to be clear and not red), arrange it on a plate and let it cool down. Slash the stretched skin between the thighs and breasts, then tilt the dish and drain the juices over the roasting pan.
Discard the clear fat, add a couple of tablespoons of water to the rest and gently simmer for few minutes. Add the greens to the warm bread, dress with 2 or 3 tablespoons of the chicken juices and the rest of the vinaigrette which you prepared before. Arrange the bread salad nicely on a serving dish.
Cut the chicken in 8 pieces, and set them on the plate with the greens and the bread salad. Serve it while still warm.

Casunziei Rossi

Friday, June 5, 2009
Casunziei Rossi

I have a lot of memories related to this dish, since when - I was about 5 year old - I was helping my grandma to seal them with a fork.
Casunziei are typical of my hometown Cortina d’Ampezzo, where every woman has her own recipe. There is also a verdi or green version, where the filling is made with some special wild greens, even if nowadays many use chard or even spinach - ahhhh what a shame! - instead. I like them both, but if I have to choose, I'll take the ones with the beets.
Obviously, I think that the ones made by my grandma Giovanna are really special. Few years ago, when she made them, she would prepare hundreds and have the whole family over for lunch, nieces, nephews and their partners included. Now that she's gotten older, the invite is more selective and we have to fight to be the chosen ones. My brother Kristian and my cousin Francesco are the biggest fan and they always manage to score a seat at her table. To tell you the truth, they even fight on who's able to eat more. If I'm not wrong, my brother still holds the record, when few year ago he was able to eat 89 casunziei! As for me, I've always wondered how they could keep track of the amount while eating. : )
Yesterday I felt a little homesick, and since the weather was cold and rainy, I thought it would be the perfect afternoon to spend in the kitchen. I dedicated them to my beloved Cortina. Don't forget to give them a try, if you happen to be there.


Casunziei Rossi
for approximately 60 casunziei

flour 300 gr. (200 gr. type O, 100 gr. semolina)
eggs 3
red beets 450 gr. (cooked amount)
potatoes 150 gr. (cooked amount)
bread crumbs 1 tbs
salt, pepper, nutmeg, cinnamon, oliv oil
butter, parmigiano cheese, poppy seeds


For the filling, cook beets and potatoes separately. You can either boil them or - better yet - roast them in the oven, wrapping them individually in foil (this way they'll absorb less water and the flavour will be more intense). Peel them and puree them using a potato masher and trying to eliminate as much water as possible. Mix the two, calculating a third of the weight of potatoes and two thirds of beets.
Heat a little oliv oil and butter in a large pan, add a tablespoon of bread crumns (you can also use flour), let it toast slightly and then add the filling, seasoning it with salt, pepper and a generous amount of cinnamon and nutmeg.
Stir and let it cook for about 5 minutes, to absorb the excess moisture, then let it cool down. You can also prepare the filling one day in advance and keep it in the refrigerator.
Prepare the egg pasta as usual, cut out circles of about two, or two and a half inches diameter, put a small amount of filling in the middle, brush the edges with egg yolk (slightly beaten in a cup) so that they will adhere better, close to form a half-moon and then seal pressing the edges with a fork.
Cook the casunziei in boiling water for few minutes, dress with grated parmigiano cheese, brown butter and poppy seeds.
Did I pass the test?